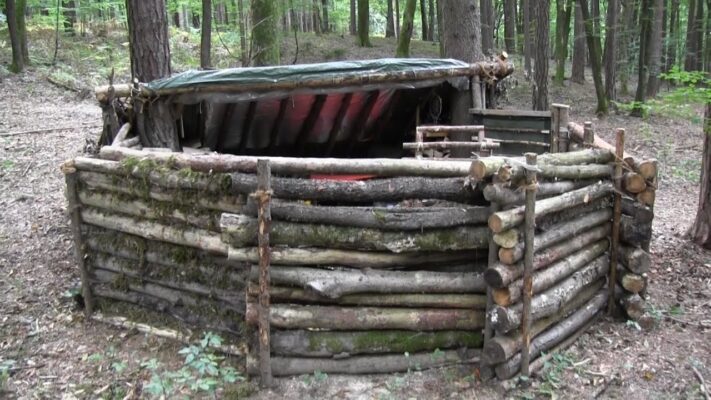
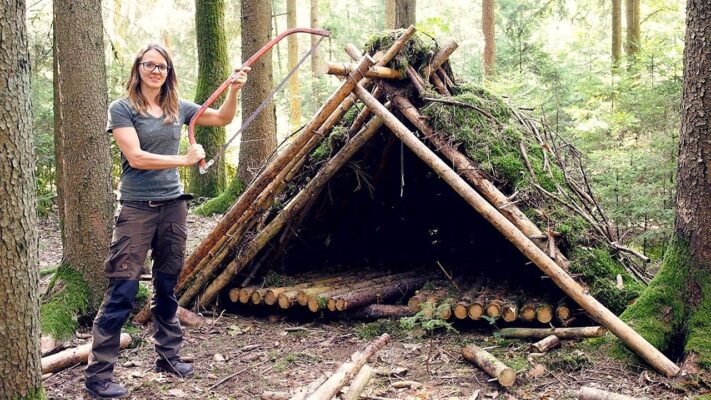
How to build a shelter in the wild is one of the most crucial skills you can learn for survival situations. Whether you find yourself lost in the wilderness, camping, or simply embracing the outdoors, knowing how to create a protective space can mean the difference between a harrowing experience and a safer, more enjoyable adventure. In this comprehensive guide, we’ll explore various techniques, materials, and locations for building your own shelter in the wild.

Understanding the Importance of Shelter
Shelter serves multiple purposes when you’re out in nature. It protects you from the elements, provides warmth, and can also serve as a psychological comfort during stressful situations. But often overlooked is the fact that the right shelter can even help you become more attuned with your environment.
The Role of Shelter in Survival Situations
When you think about surviving in the wild, your mind might turn to food and water. While those are essential, a well-constructed shelter should be your first priority. The primary purpose of any shelter is to shield you from harsh weather conditions like rain, wind, snow, and extreme heat.
In colder climates, a good shelter will conserve body heat and minimize exposure to freezing temperatures. Meanwhile, in warmer areas, it can provide shade from the sun and mitigate risks related to dehydration and sunstroke. It’s not just about physical protection; a shelter also impacts your mental state, allowing you to feel secure and focused on other survival tasks.
Different Types of Shelters
Before diving into how to build a shelter in the wild, it’s essential to understand the different types available. Each type has its advantages and disadvantages depending on the environment you’re facing.
- Lean-To: This is one of the simplest forms of shelter and is effective in moderate weather. A lean-to generally consists of a slanted roof made from branches and leaves, providing coverage from rain.
- A-Frame: Similar to a tent, an A-frame structure offers superior strength and stability. It requires more material than a lean-to but can withstand harsher conditions.
- Tarp Shelter: Using a tarp can offer versatility and quick assembly. Depending on your setup, a tarp can be used as a simple covering or transformed into a more complex structure using poles or trees for support.
- Debris Hut: This shelter uses natural materials found in the environment, such as leaves, sticks, and moss. Although it takes longer to build, a debris hut provides excellent insulation.
Understanding these structures prepares you for your personal journey into wilderness survival.
Choosing the Right Location for Your Shelter
Now that you’re familiar with various types of shelters, let’s explore how location plays a critical role in your setup. Finding the ideal spot can save you from potential dangers and enhance your survival efforts.
Assessing Safety Risks
The first step in selecting a suitable location for your shelter involves assessing the safety risks associated with your chosen area. Avoid places prone to flash floods, such as riverbanks or low-lying grounds, especially if you know there is a chance of rain. Similarly, steer clear of areas beneath dead trees or overhangs, which could collapse and pose a risk to your safety.
Another important aspect is wildlife. Research the local fauna before you venture out; some regions may be home to dangerous animals. Opt for open fields where visibility is high rather than dense thickets where animals could approach unnoticed.
Proximity to Resources
Once you’ve eliminated unsafe areas, consider proximity to vital resources such as water, food, and firewood. Ideally, you want to set up your shelter near a freshwater source while ensuring it’s far enough away to avoid flooding or contamination.
Look for signs of edible plants and fruits, and scout the area for potential fishing spots or game trails. Remember that setting your shelter strategically can improve your chances of finding sustenance without spending excessive time foraging.
Terrain Considerations
Different terrains present unique challenges and advantages when it comes to building a shelter. Flat ground offers ease of construction and stability, whereas rocky or uneven surfaces may require additional effort to make level ground.
In hilly or mountainous areas, opt for elevated spots to ensure you’re safe from rising water levels and falling debris. Keep in mind that the slope and direction of the terrain can affect temperature and wind conditions, making some areas more hospitable than others.
The right location can dramatically enhance your comfort level, psychological state, and overall efficiency during your outdoor adventures.

Materials for Building Your Shelter
Once you’ve selected the perfect location, it’s time to gather materials for constructing your shelter. The choice of materials largely depends on what your environment offers, but understanding their properties will allow you to optimize your shelter design.
Natural Materials from the Environment
One of the most significant advantages of wilderness survival is the accessibility of natural materials. Trees, bushes, grasses, and rocks can all be utilized effectively in shelter construction.
For instance, fallen branches can serve as the frame for your structure, while thicker logs provide sturdy walls. Use foliage such as evergreen boughs, leaves, or grass to create waterproof roofing and insulate against cold temperatures. These materials can be found within close proximity, significantly reducing the energy required to transport them.
Man-Made Options
If you happen to be camping in an area with human presence, don’t overlook man-made materials. Tarps, ropes, and even duct tape can come in handy for constructing a durable shelter. Tarps are particularly versatile because they can be used in various configurations and can easily be stowed in your backpack.
If you have access to tools, consider crafting stakes or other supportive structures using a knife or multi-tool. However, always prioritize safety; using sharp objects requires caution to avoid injury.
Evaluating Material Durability
Not all natural materials offer the same durability, so evaluating your options is vital. Softwoods tend to decay faster than hardwoods, rendering them less suitable for long-term shelters.
Consider the climate as well; dry climates may allow for more substantial constructions using wood, while humid areas require materials that resist mold and rot. Knowing the lifespan and resilience of various materials will aid you in creating a reliable shelter.
Your choice of materials can greatly impact the quality of your shelter and ultimately your survival experience.
Techniques for Constructing Your Shelter
Now that you have gathered your materials and chosen a location, it’s time to dive into the nuts and bolts of actually constructing your shelter. The following steps will provide you guidance on how to build a shelter in the wild effectively.
Creating a Shelter Framework
Start with establishing a strong framework to support your shelter. For a lean-to, find a sturdy tree or rock as your anchor point, leaning longer branches against it at an angle to create a roof structure.
In contrast, an A-frame requires two parallel supports placed vertically in the ground, then connecting branches horizontally at the top. Ensure that your base is stable, as this will support the weight of additional materials.
While building your framework, keep in mind the height of the entrance. Leaving enough room for you to sit up or move comfortably is essential.
Adding Insulation and Coverage
Once the framework is complete, it’s time to insulate and cover your shelter. Start layering with larger branches or logs, followed by smaller twigs, and ultimately add foliage. Building in layers provides better weather resistance and helps trap heat.
Aim to cover at least three sides of your structure, leaving only a small opening for entry. If possible, angle your entrance away from prevailing winds to reduce drafts and exposure.
Don’t forget to check your work frequently; adjust as necessary to ensure that there are no gaps that could let in cold air, rain, or snow.
Securing Your Shelter
After completing the structure, ensure everything is secure. Test the integrity of your shelter by applying pressure to the walls; they should hold firm without collapsing.
Use stones or heavier branches to weigh down loose materials on the roof, preventing them from being blown away by wind. If you have rope or cordage, tie down additional stays to strengthen your framework further.
Take your time with this step; a well-secured shelter not only provides essential protection but also brings peace of mind.

Conclusion
Being able to successfully build a shelter in the wild is a testament to your survival skills and your ability to adapt to challenging circumstances. A well-constructed shelter not only protects you from environmental elements but also enhances your confidence and minimizes stress.
As you venture into the wilderness, remember that your skills will continue to develop through practice and experience. Embrace the challenge, and always carry the knowledge of how to build a shelter in the wild, as it empowers you to navigate the unpredictability of nature.
With dedication, creativity, and foresight, you can transform any outdoor experience into a rewarding adventure, full of learning and exploration. Happy adventuring!

